-1.png?width=710&height=340&name=Web-colour%20(1)-1.png)
- On the Merchant home page, click on ‘Create Merchant’ in the top left corner

2) Fill in the Merchant details as seen below in the demo account.
*There will be an automated password which will be a mix of letters and numbers, I suggest changing this to something that is easy to remember - The Merchant can change this at a later point. 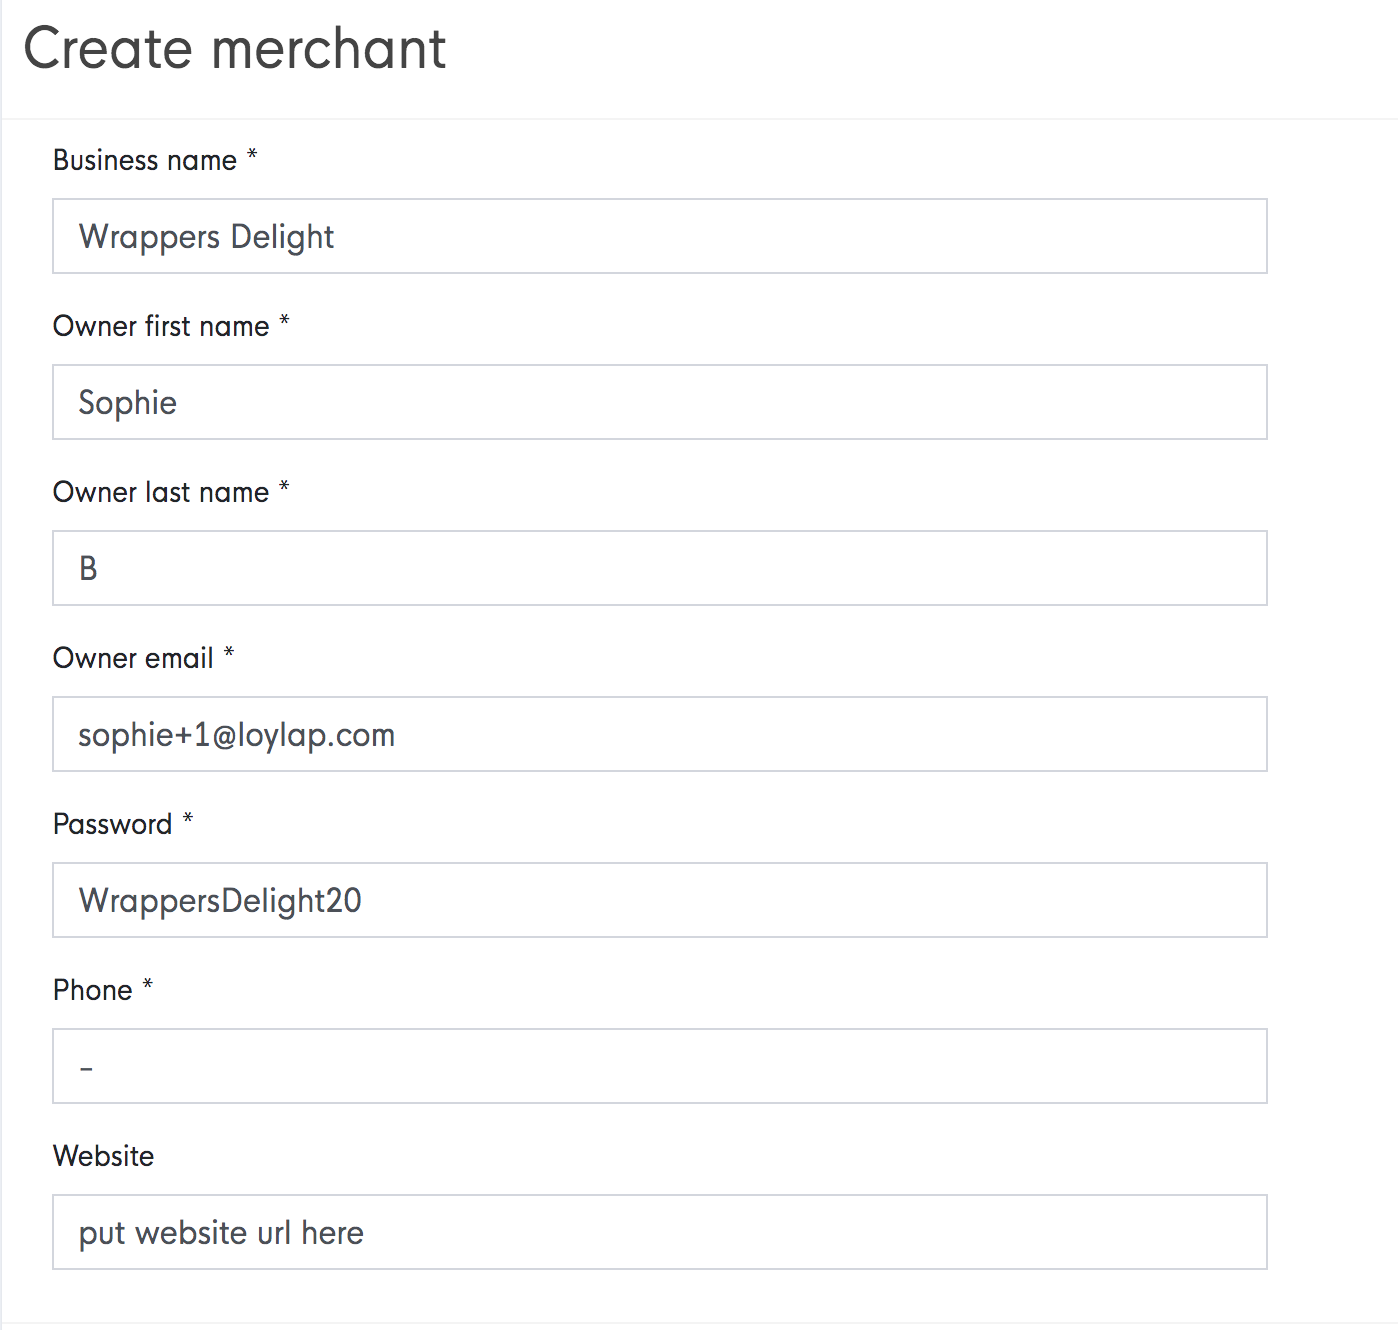
* Generally you will always add the business owners email, which should match the one on their Clover account if they are using Clover.
*You should also add the businesses website and the owners contact number.
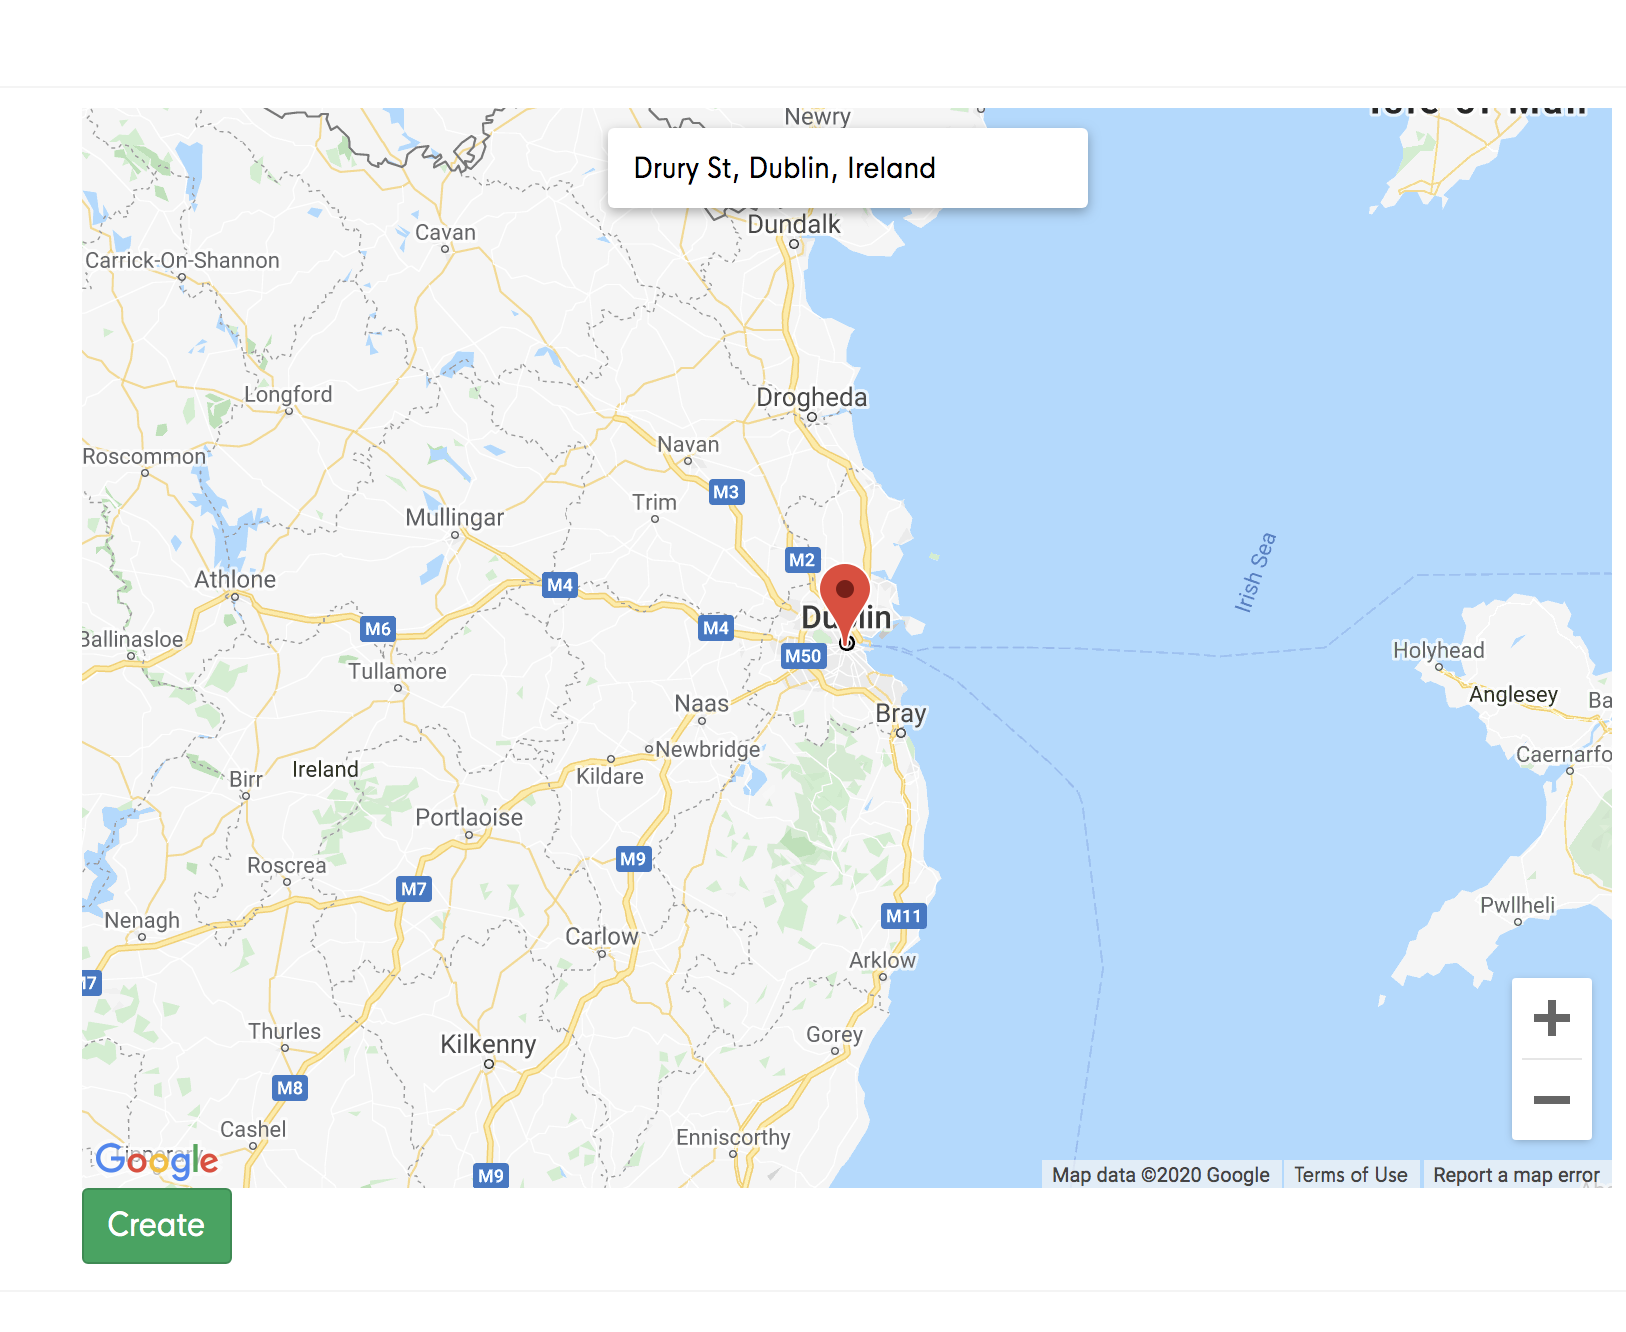
Next, you need to input the business address in the map to the right of the screen, as seen below.
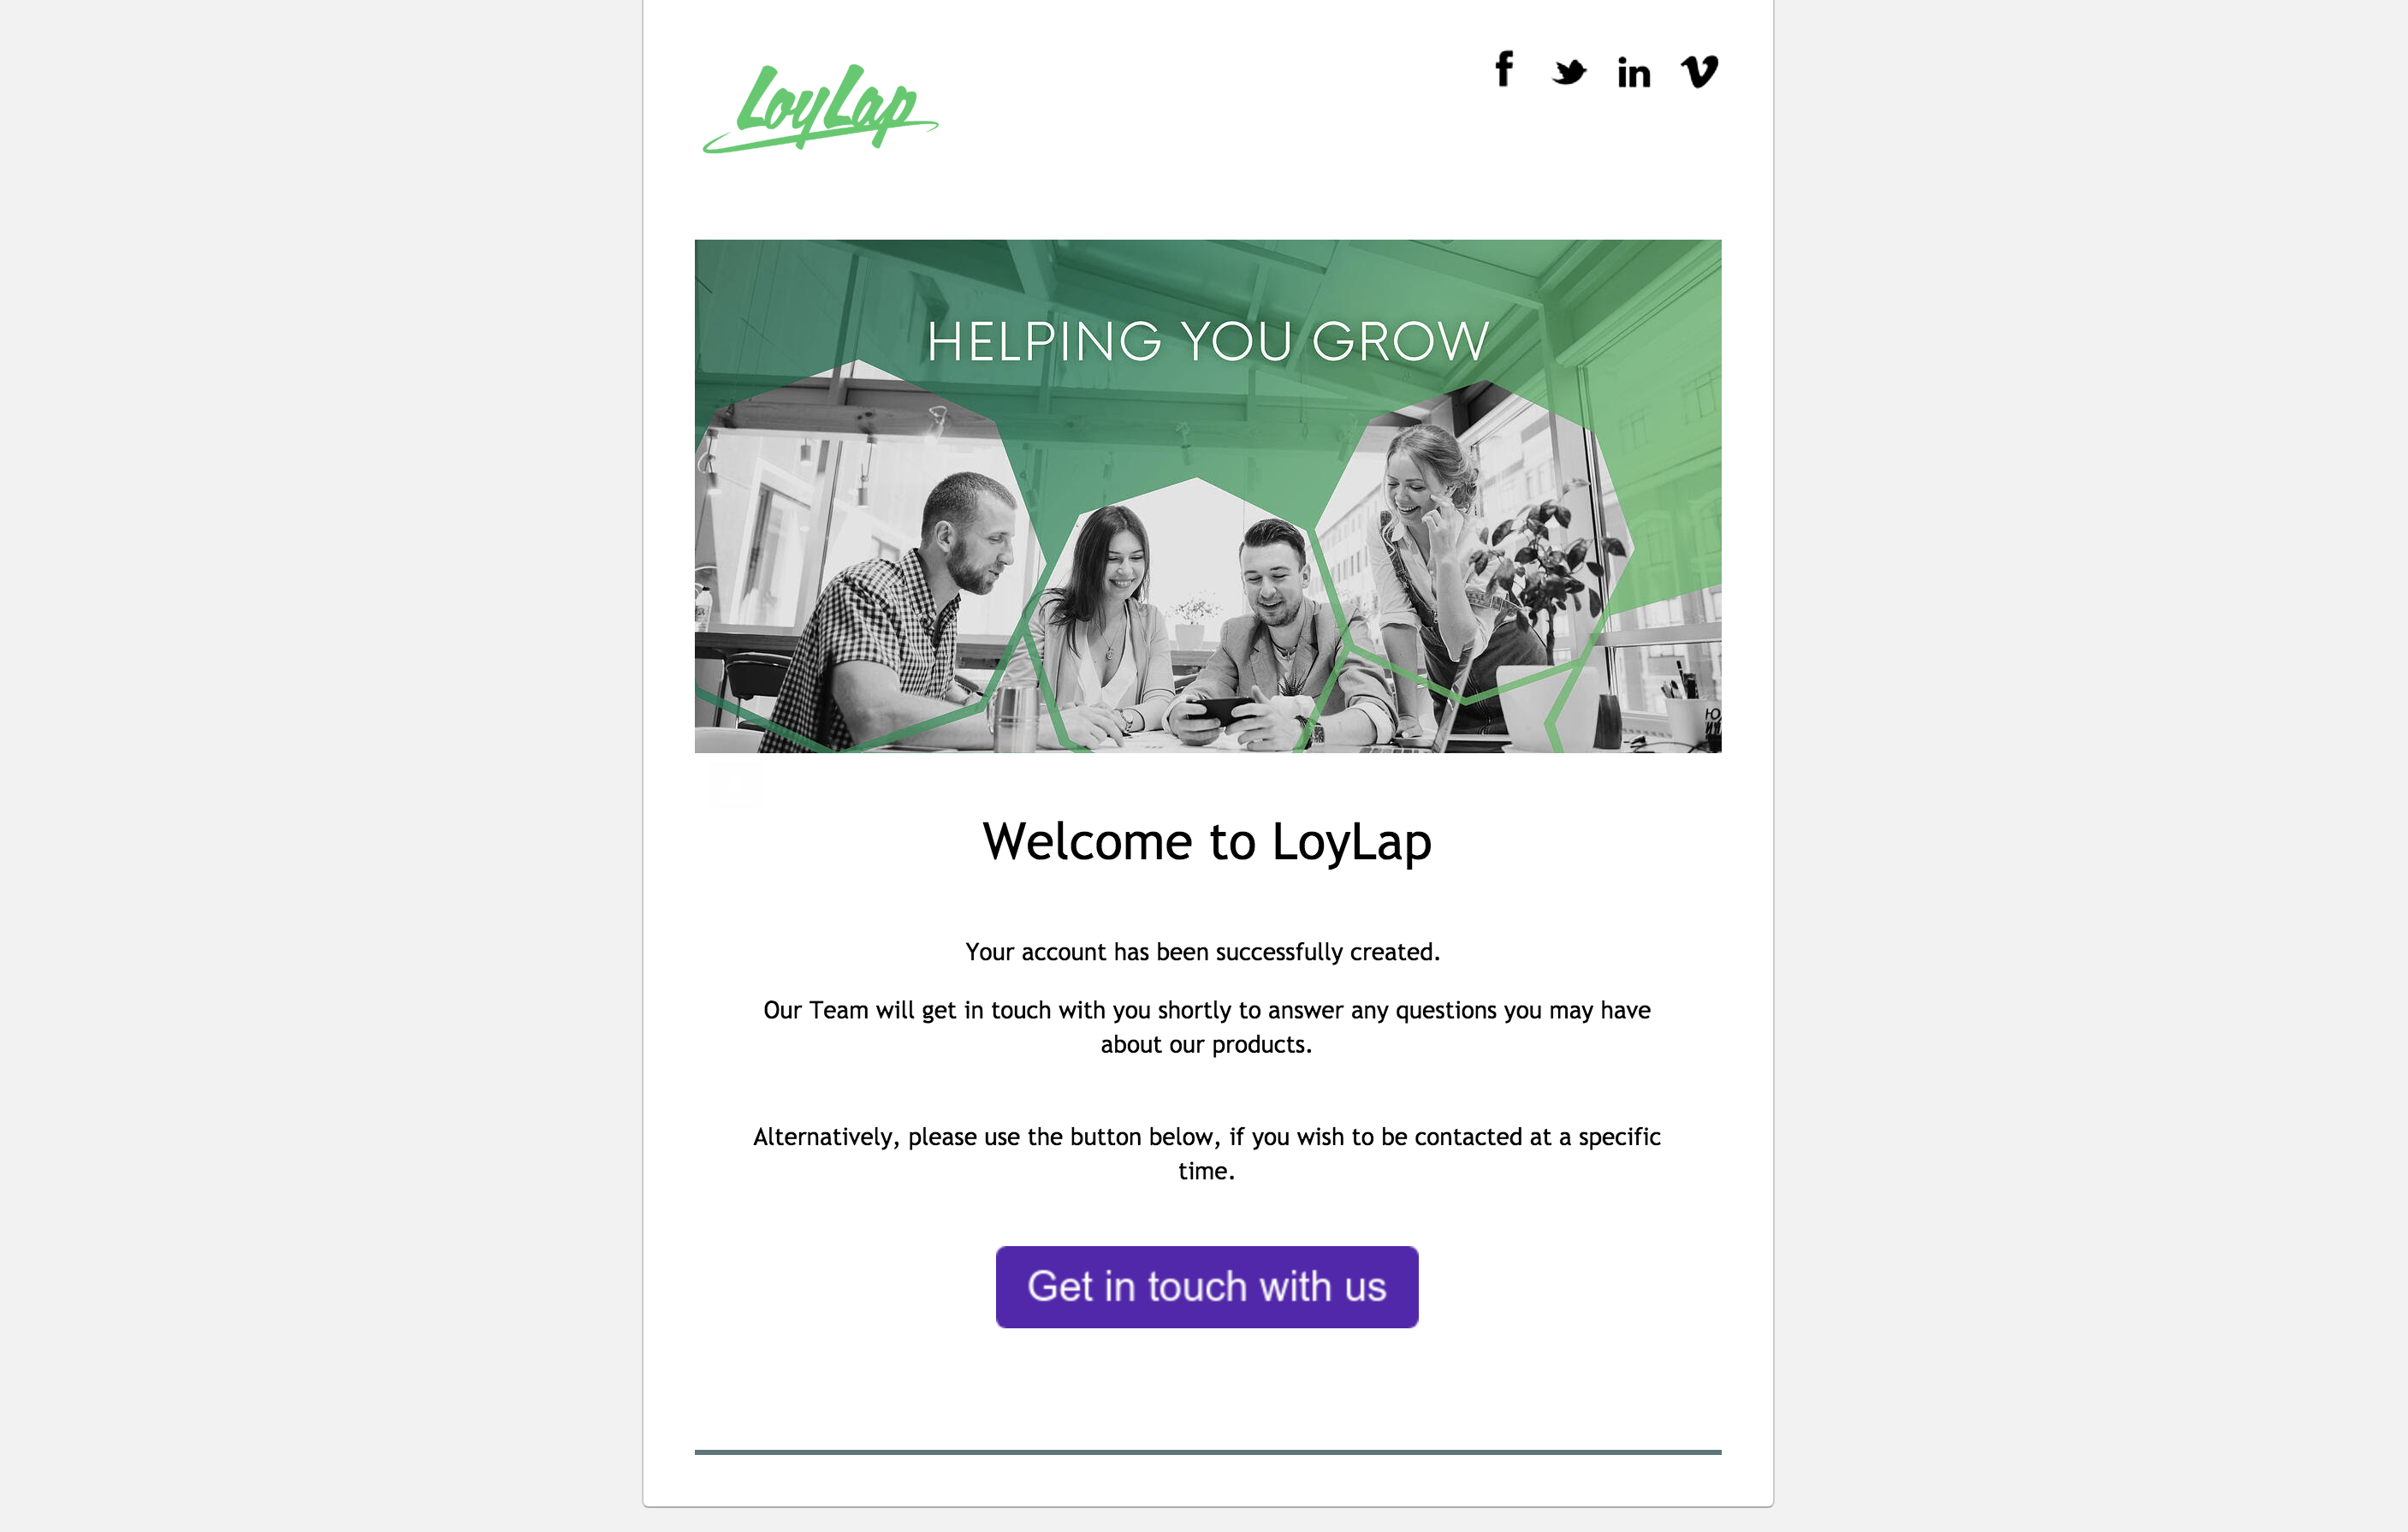
When you have completed this page, press ‘create’ and the business owner will then receive an email, which will look like this:
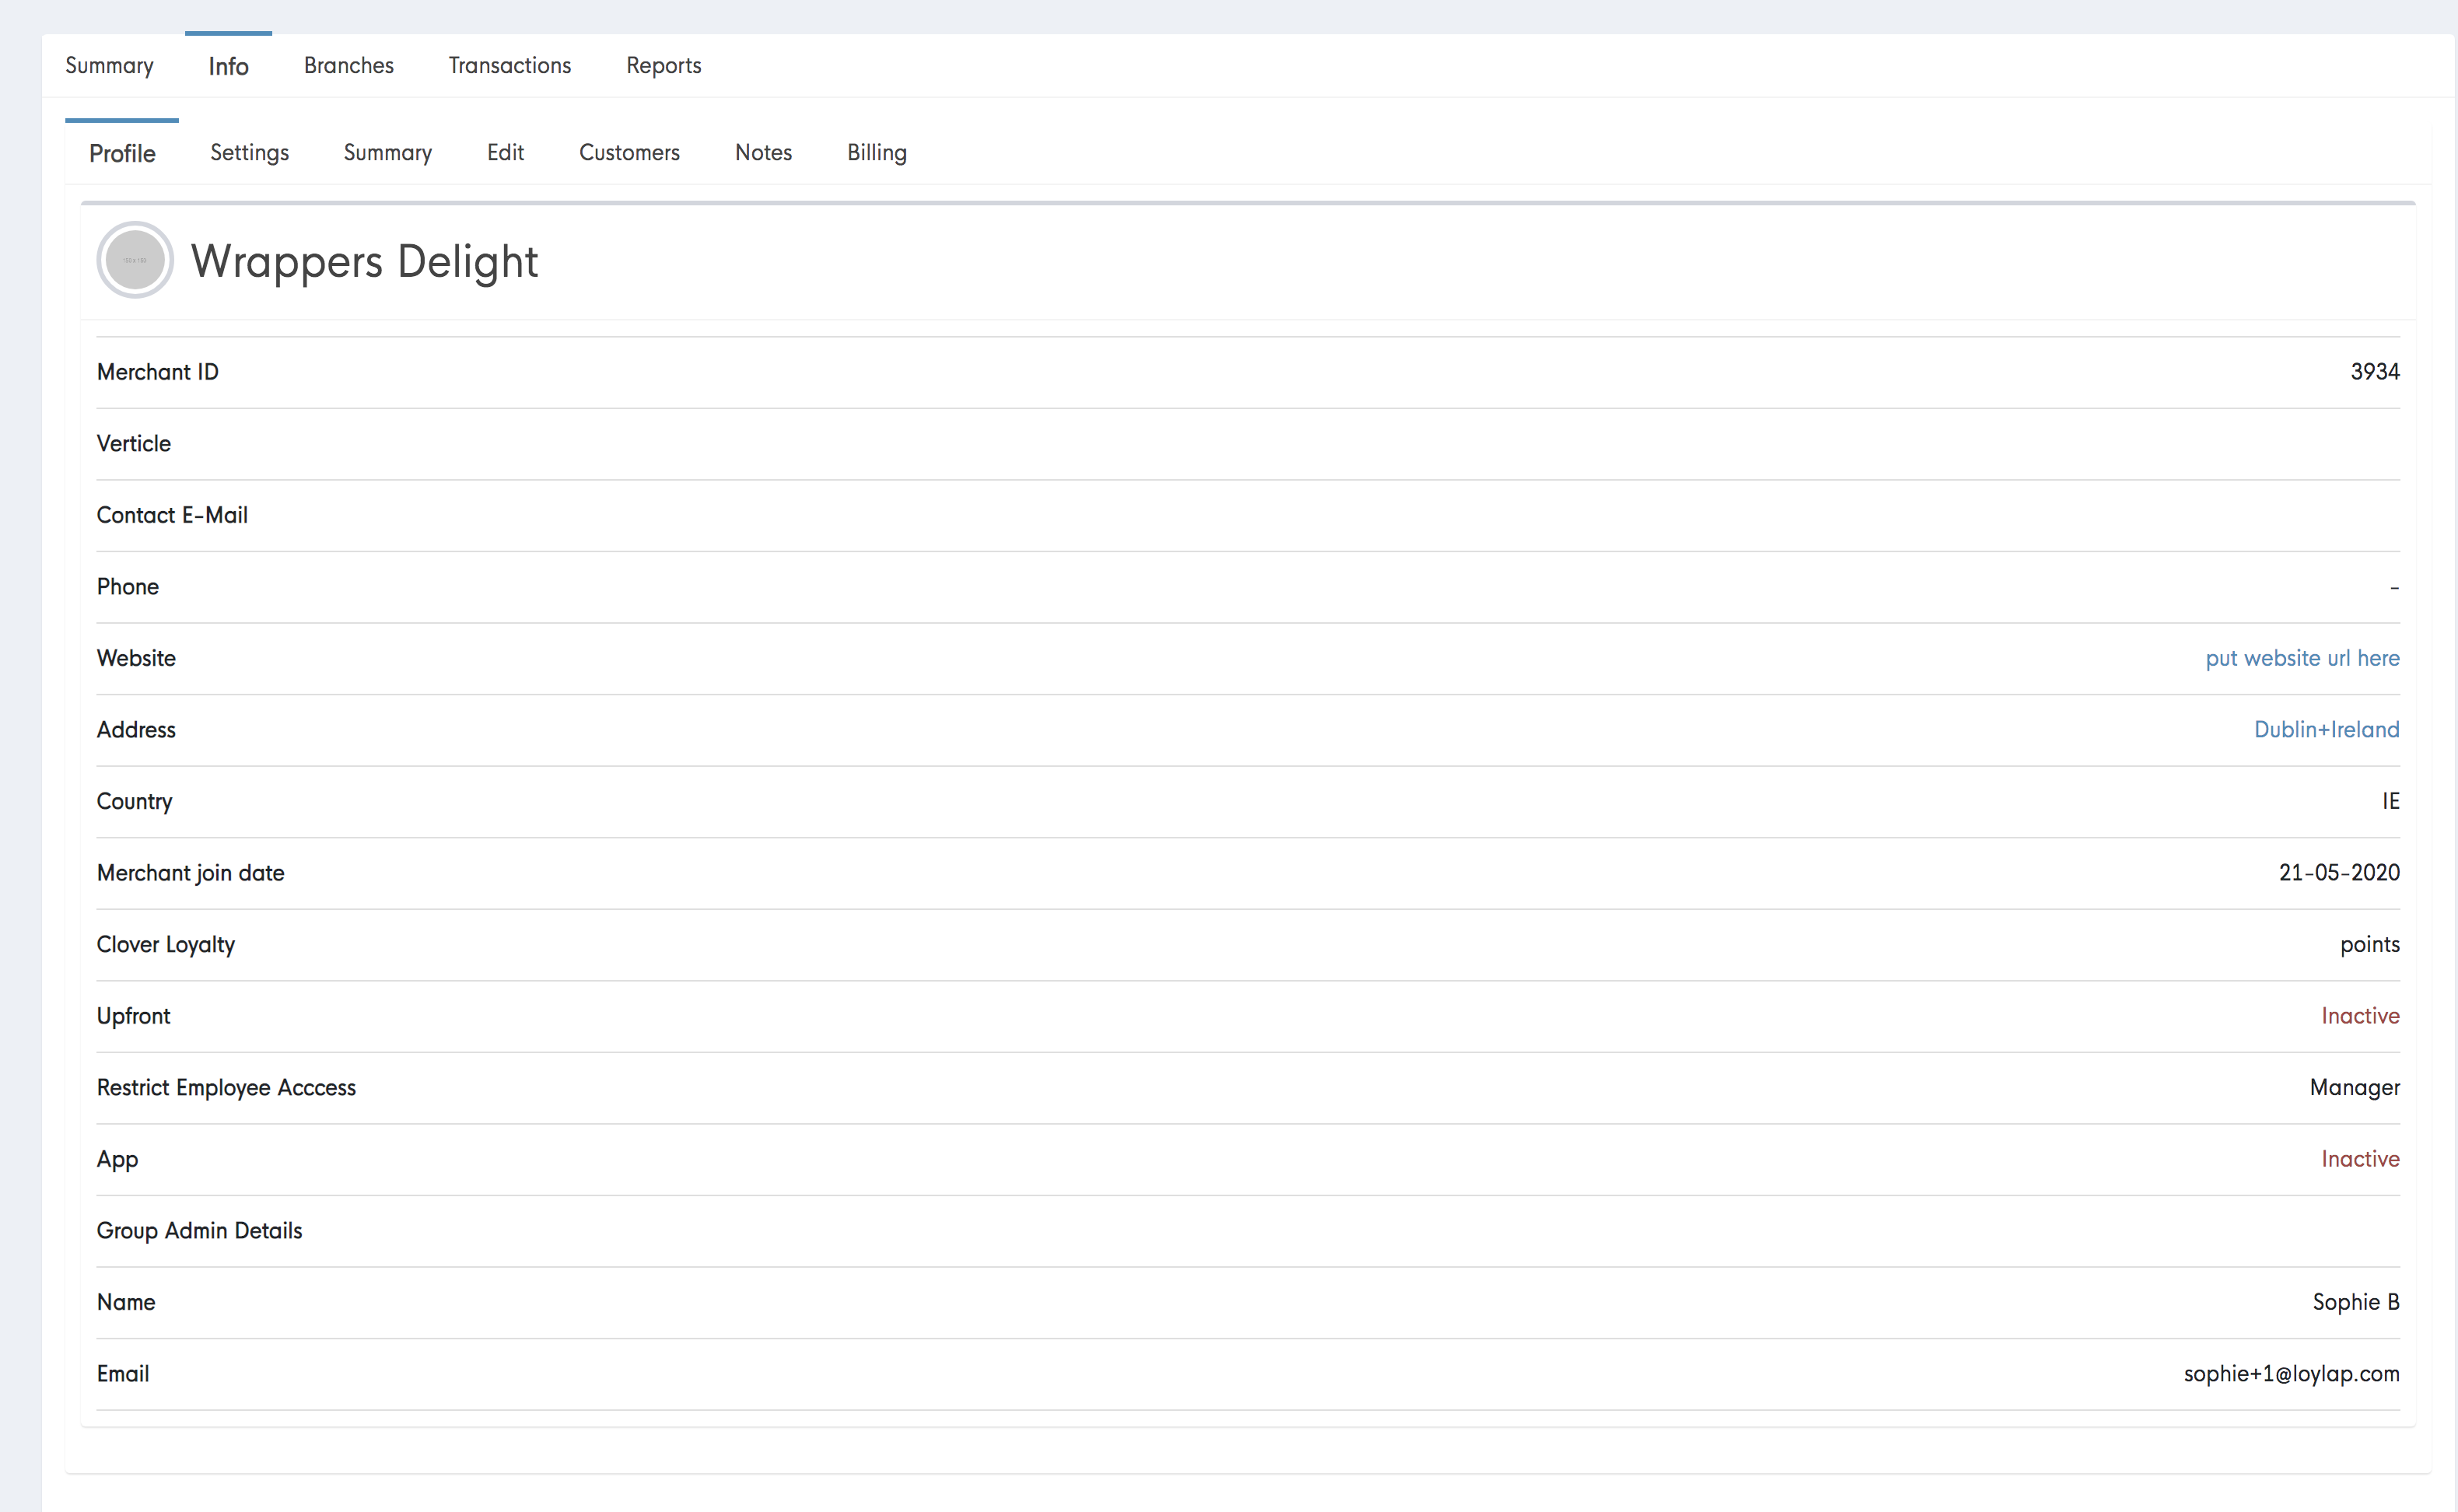
The Merchants page will then be created, and it will look like this on the Admin portal:
- The next step is to add the on site contact number, email, the store branding and to amend the settings so that the Business portal is functional and the store front on the app looks as it should for the businesses customers.
Go to ‘Edit’ and fill in the below fields - It’s pretty self explanatory, and all of the relevant info can be found on the businesses website or their social media pages.
*If the address is not accurate, it is important to re input the business address on the right of this page also.
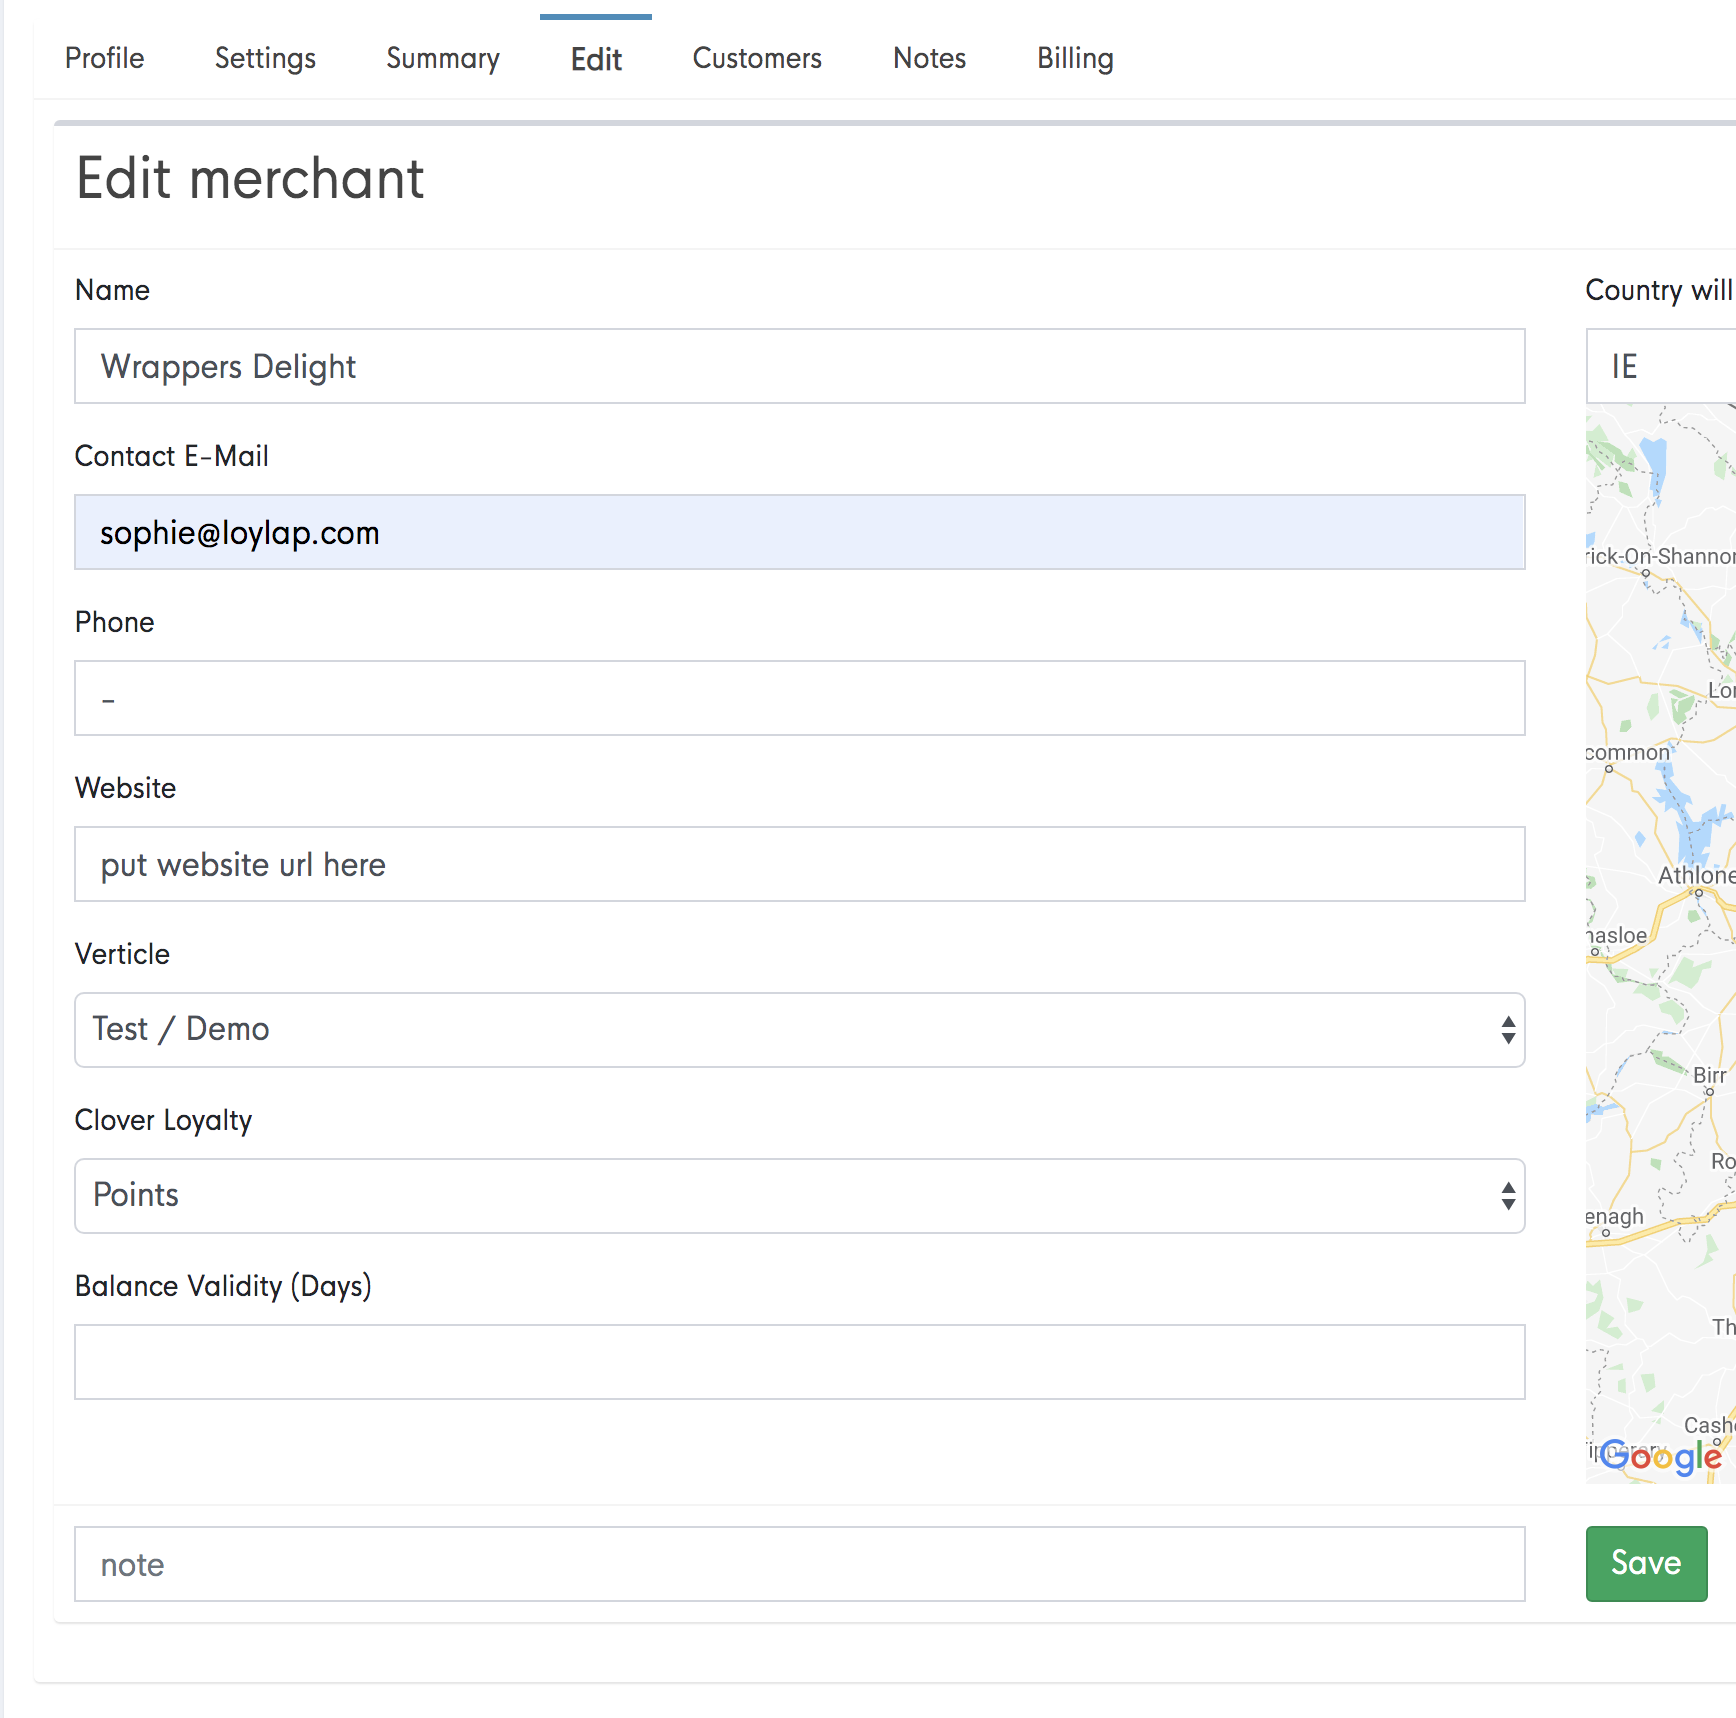
Hit save when finished.
Go to ‘Settings and tick ‘visible in app’
Enable the transaction types depending on what service the Merchant has signed up for
Tick the following business portal settings
Go to ‘App builder’, where you can customise the colour tones to fit the brand and add the brand logo.
Then go to ‘POS App Settings’ and tick the following settings
Hit save.
Once all of the above is done, Click on branches, - The branch name will be defaulted to ‘Dublin+Ireland’ - This will need to be edited and the businesses details will need to be entered for a second time. The open times for the store will also need to be added here.
Click on the branch
Renter the details as seen below
Don’t forget the open times !
Lastly, goto ‘settings’ within the branch and then go down to ‘app builder’ and re input the brand logo.
Then you’re done :)